This guide explains the process of creating a Time Tracker widget and integrating it into a Notion page.
Step 1: Setup your Time Tracker widget
- Click the "Create +" button in the menu to access all available widgets
- Use the filter to select "Productivity" category
- Choose the "Time Tracker Widget" card
![]()
The customization interface will then load for personalization.
![]()
Configuration Options
| Property | Description |
|---|---|
| Title | Set a custom name for your widget that best represents its purpose |
| Show Title | Toggle visibility of the widget's title |
| Show Icon | Display an icon alongside the title |
| Projects | The project list is prefilled with example projects by default. You can add new projects, remove existing ones, or rename them |
You can create projects within the widget, though deletion requires accessing the Notion Widgets app.
Step 2: Define style of the widget
![]()
Customize the following properties:
| Property | Description |
|---|---|
| Background Color | Set widget background |
| Font Color | Color titles and icons |
| Button Color | Color start/stop buttons |
| Icon Color | Color button icons |
| Counter Color | Color for time display text |
| Counter Font Size | Choose S, M, L, or XL options |
Step 3: Connect Notion database
Select the Notion page where the database should be created. You can search for your desired page by typing its name; a minimum of 3 characters is required.
![]()
Currently, only new database creation is supported. Existing database integration is coming soon.
| Property | Description |
|---|---|
| Select Notion page | Search for your target page |
| Name of the database | Set a custom name for this database, making it easy to locate on your Notion page |
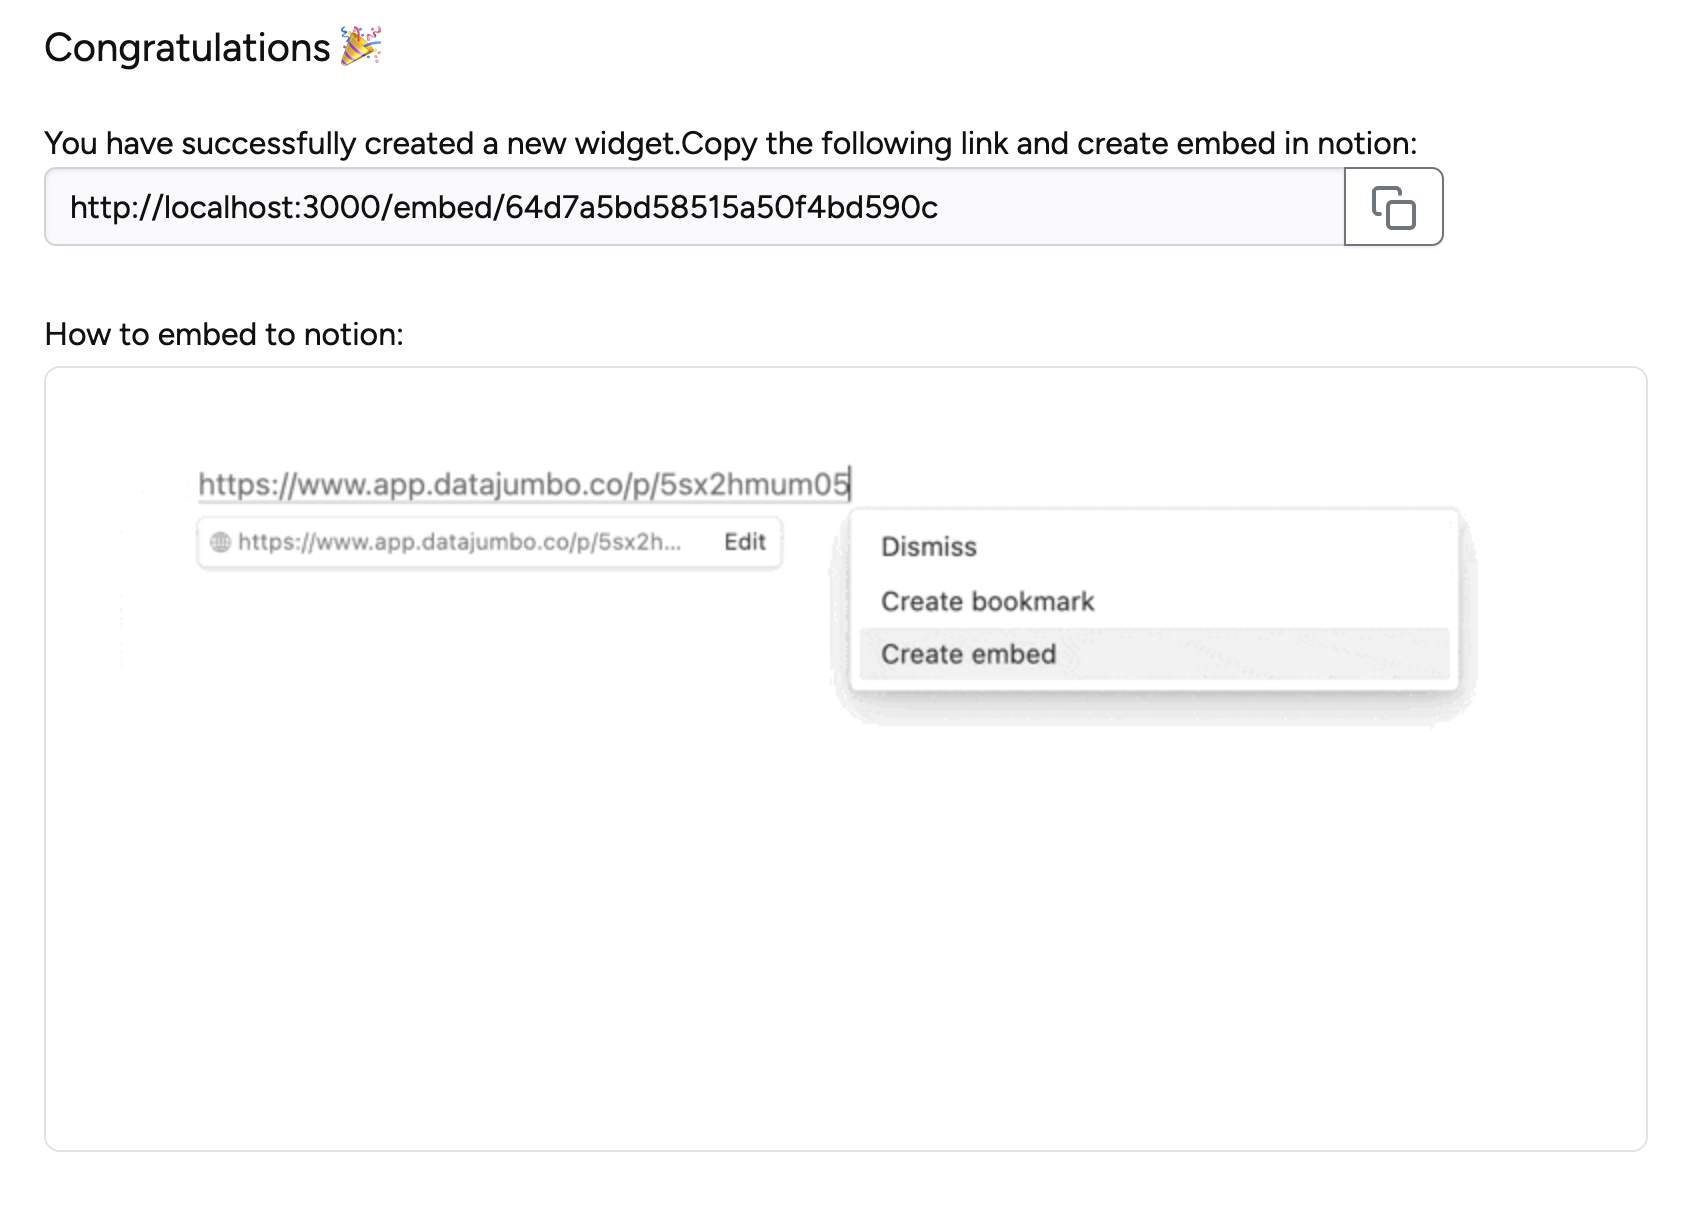
Step 4: Create your Time Tracker widget
Click the "create Widget" button to finalize setup. After successful creation, copy the link and add it to your Notion page.
![]()